Have you ever found yourself in a situation where your volleyball ball has suddenly deflated due to a puncture? It can be frustrating, but fear not, because in this post, I will guide you through the steps of repairing your punctured volleyball ball. It’s important to act quickly, as leaving a puncture unrepaired can lead to further damage and potential injury. However, with the right tools and a little bit of know-how, you can have your ball back in action in no time.
Identifying the Puncture
One of the first steps in repairing a punctured volleyball ball is identifying the location of the puncture. This will help you determine the extent of the damage and decide on the best course of action to fix it.
Inspecting the Volleyball Surface
Start by visually inspecting the surface of the volleyball for any visible cuts, tears, or punctures. Run your hands over the surface, feeling for any raised areas or changes in texture that could indicate a puncture. Look for any signs of damage, such as a hissing sound when you press on the ball, which could indicate a significant leak.
Locating the Air Leak
If you suspect a puncture but cannot visually identify it, you can use a solution of soapy water to locate the air leak. Inflate the volleyball and then apply the soapy water to the surface. Watch for any bubbles forming, as this indicates the location of the air leak. Once you have located the puncture, mark its position to make it easier to repair.
Comparing various volleyball ball textures
Preparing for the Repair
Obviously, the first step in repairing a punctured volleyball ball is to gather the necessary materials and prepare the puncture area. Before you begin the repair process, it’s important to understand the steps involved to ensure that the repair is done correctly. You can refer to the detailed guide on How to Fix a Volleyball Leak for additional assistance.
Gathering Necessary Repair Materials
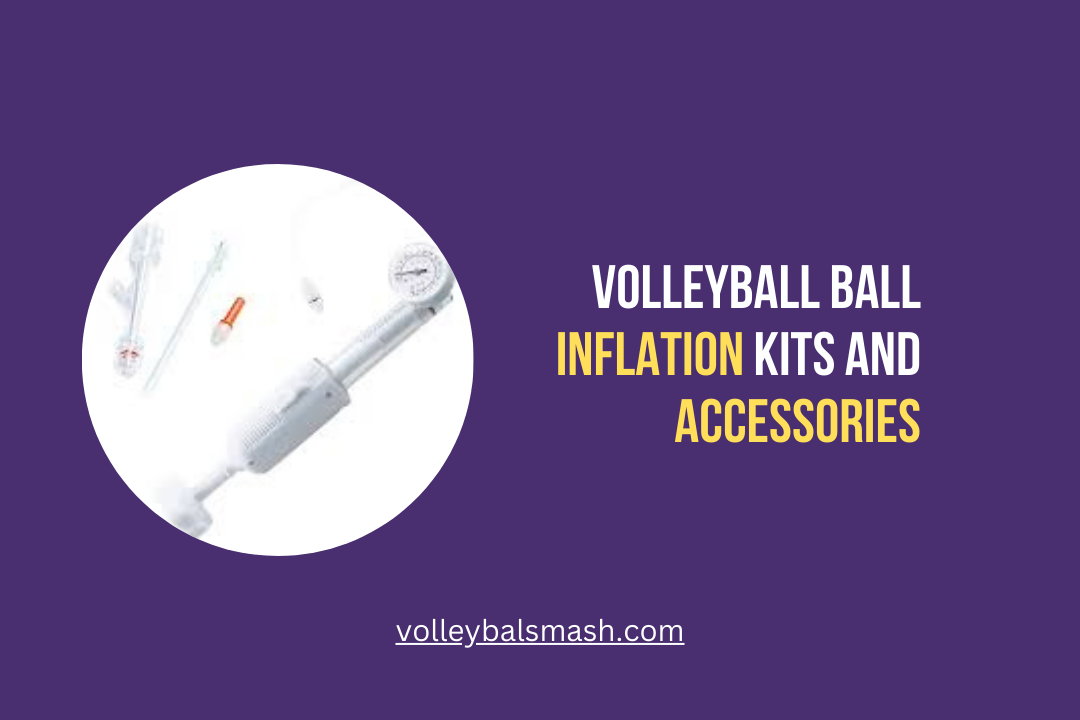
Before you start the repair, you will need a few key materials. You’ll need a volleyball repair kit, which typically includes a puncture repair sealant, a valve adapter, and an inflation needle. In addition, you may also need a pair of scissors, fine-grit sandpaper, and a clean cloth. Make sure you have all the necessary materials at hand before you proceed with the repair.
Cleaning the Puncture Area
Before you can start the repair process, it’s important to thoroughly clean the puncture area. Use the fine-grit sandpaper to gently sand the area around the puncture to remove any dirt, debris, or rough edges. This will ensure that the sealant adheres properly to the surface of the ball. After sanding the area, use a clean cloth to wipe away any remaining dust or particles. It’s important to have a clean and dry surface for the repair to be effective.
The Repair Process
However, repairing a punctured volleyball ball is a straightforward process that can be easily done at home. The first step is to identify the puncture and gather the necessary materials for the repair. Once you have everything you need, you can begin the repair process.
Applying the Adhesive Patch
Once you have identified the puncture, you will need to clean the area around it to ensure that the adhesive can bond properly. Apply the adhesive patch over the puncture, ensuring that it covers the entire affected area. Press down firmly on the patch to secure it in place, and allow it to dry according to the manufacturer’s instructions.
ball pressure testing methods
Sealing and Testing the Repair
After the adhesive has dried, you can then apply a sealant over the patch to provide an extra layer of protection. Make sure to smooth out the sealant and remove any excess to ensure a clean finish. Once the sealant has dried, you can inflate the volleyball to its recommended pressure and test the repair by bouncing the ball. If the repair holds and the ball retains its pressure, you can consider the repair successful.
Lastly, when it comes to repairing a punctured volleyball ball, prevention and regular maintenance are key to avoiding future issues. There are several steps you can take to prevent punctures and maintain the condition of your volleyball ball. Investing in a reliable repair kit such as the Unique Sports Ball Doctor Leak And Flat Fix-Repair Kit can also be a valuable addition to your volleyball equipment.
Tips for Preventing Future Punctures
One of the best ways to prevent punctures in your volleyball ball is to store it properly when not in use. This means keeping it away from sharp objects and extreme temperatures that could weaken the material. Additionally, checking the pressure regularly and keeping it inflated to the recommended level can help prevent excessive stress on the ball, reducing the risk of punctures. Another important tip is to avoid playing on rough surfaces that could cause damage to the outer layer of the ball. Any punctures or damage to the surface should be addressed immediately to prevent further deterioration.
Regular Volleyball Maintenance Routine
Implementing a regular maintenance routine for your volleyball ball can help extend its lifespan and prevent punctures. This routine should include cleaning the ball with a damp cloth after each use to remove dirt and debris that could weaken the material. You should also inspect the ball for signs of wear and tear and address any issues promptly. Additionally, storing the ball in a protective case or bag when not in use can help prevent damage from external elements.
volleyball balls for special events
The Importance of Repairing a Punctured Volleyball Ball
The process of repairing a punctured volleyball ball is crucial to ensuring the longevity and performance of the ball. By following the steps outlined in this guide, you can effectively repair the puncture and avoid the need to purchase a new ball. Regular maintenance and repairs will extend the life of your volleyball ball, saving you time and money in the long run. Remember, a well-maintained volleyball ball will enhance your game and provide a better experience for you and your teammates. So, don’t neglect the maintenance of your volleyball ball and make sure to repair any punctures as soon as they occur.
FAQ
How can I repair a punctured volleyball ball?
To repair a punctured volleyball ball, you will need a puncture repair kit specifically designed for sports balls. First, deflate the ball completely. Once deflated, locate the puncture and clean the area thoroughly. Apply the adhesive from the repair kit and place the patch over the puncture, ensuring it is securely in place and airtight. Allow the adhesive to dry before re-inflating the ball to the appropriate pressure.
Can I use household items to repair a punctured volleyball ball?
While it may be tempting to use household items such as super glue or a regular patch and adhesive, it is highly recommended to use a puncture repair kit specifically designed for sports balls. These kits are formulated to withstand the wear and tear of sports equipment and provide a reliable and long-lasting repair.
How long will the repair last on a punctured volleyball ball?
When properly repaired using a puncture repair kit, a punctured volleyball ball can last for an extended period, depending on the amount of wear and use it receives. It is important to regularly inspect the ball for any signs of damage and reapply or reinforce the repair as needed to maintain its integrity.